

Outback Steakhouse Bloomin’ Onion – Crispy, Golden, and Perfect for Dipping
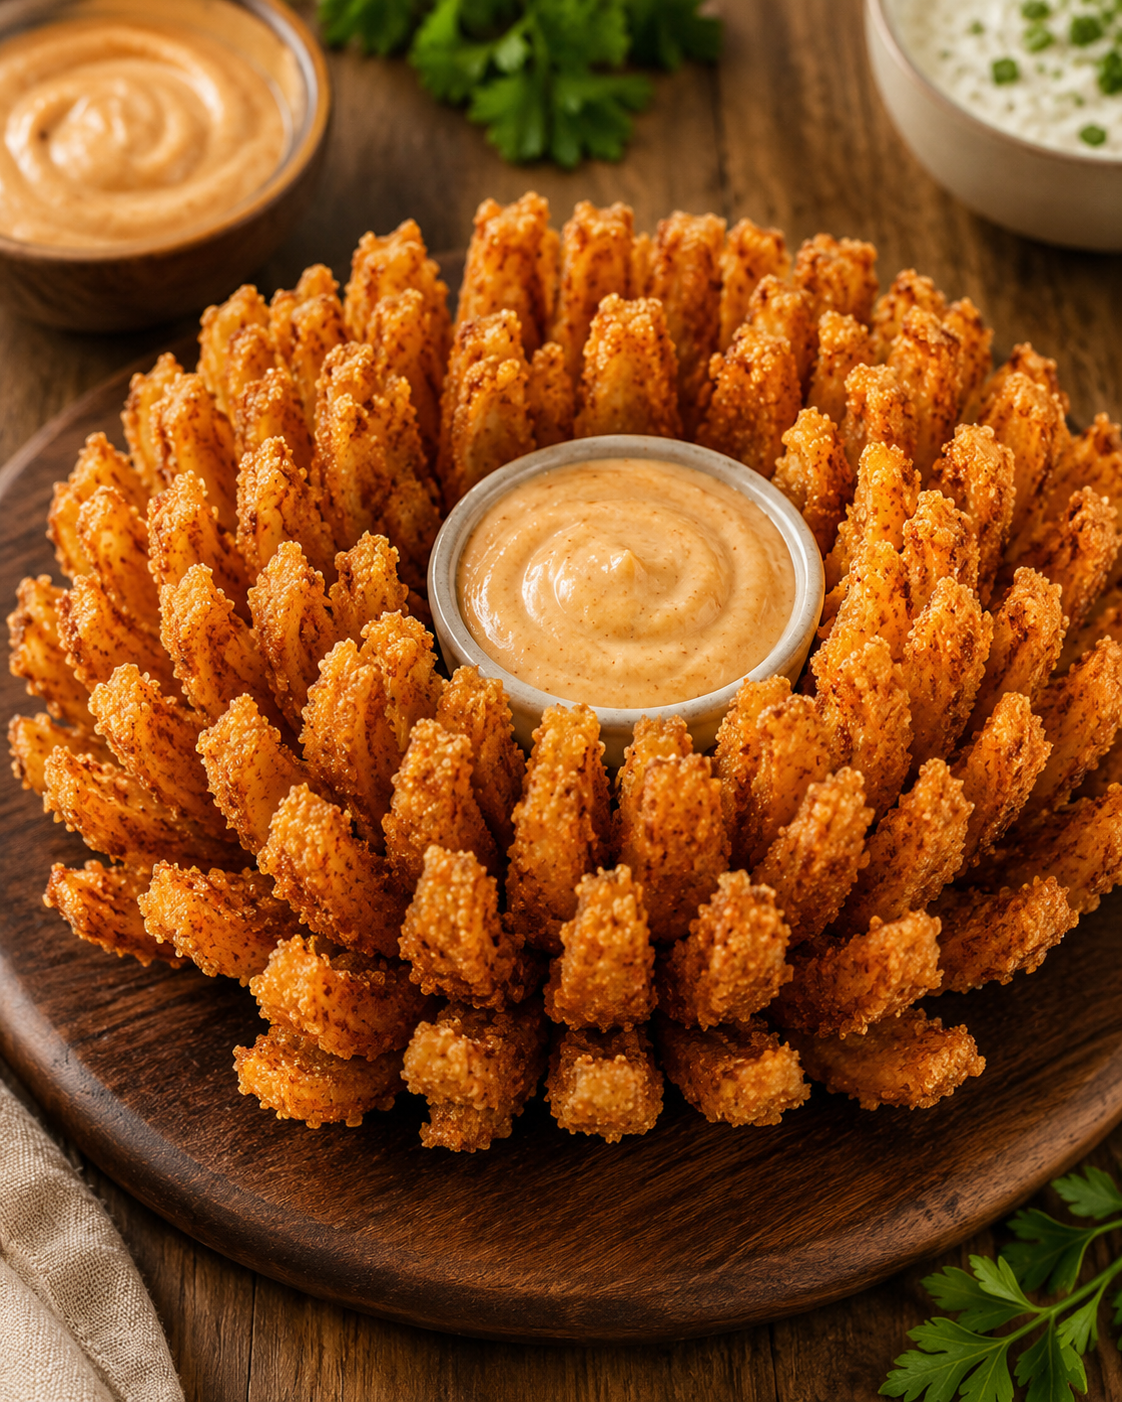
There is something incredibly satisfying about a Bloomin’ Onion. A whole sweet onion is carefully cut into delicate petals, coated in a flavorful seasoned crust, and fried until every little edge turns golden and crispy. Once you pull it apart and dip one of those crunchy petals into a creamy, tangy sauce, it’s easy to understand why this appetizer has become such a restaurant favorite.
The good news is that you don’t have to wait for a restaurant visit to enjoy it. This homemade version brings that same fun, shareable appetizer feeling right into your kitchen. The onion becomes tender and naturally sweet as it cooks, while the seasoned coating adds plenty of savory flavor with a gentle kick from paprika and cayenne.
It’s especially fun to serve when you’re having friends or family over. Instead of putting out a bowl of ordinary appetizers, bring the whole golden onion to the table and let everyone pull apart their own crispy petals. Add the creamy dipping sauce in the center and you’ve got a centerpiece that’s just as entertaining as it is delicious.
Flavor & Texture Highlights
- Crispy, golden coating with plenty of savory seasoning.
- Tender, naturally sweet onion underneath the crust.
- A subtle spicy kick from cayenne and paprika.
- Crunchy edges that are perfect for dipping.
- Creamy, tangy dipping sauce with a hint of heat.
- A fun appetizer that’s made for sharing.
Jump to Section
- Why You’ll Love This Recipe
- What You’ll Need to Make This Recipe
- How to Make a Bloomin’ Onion Step by Step
- Expert Tips
- Recipe Variations
- How to Store and Reheat It
- What to Serve With
- Frequently Asked Questions
- Final Thoughts
Why You’ll Love This Recipe
This Bloomin’ Onion is one of those recipes that feels much more impressive than the amount of work it actually requires. Once you get the cutting technique down, the rest is simply dipping, coating, and frying.
The combination of a sweet onion and a boldly seasoned crust makes every bite interesting. The outside is crisp and crunchy, while the onion petals underneath become tender and flavorful. The creamy dipping sauce adds another layer of flavor and gives you the perfect contrast to all that crunch.
It’s also a wonderful recipe for entertaining. The finished onion looks beautiful on a serving plate, and guests can simply pull off individual petals as they eat. It’s casual, interactive, and guaranteed to get everyone’s attention.
What You’ll Need to Make This Recipe
A large, firm sweet onion is the most important ingredient. Choose one that’s evenly shaped and large enough to create plenty of petals. A firm onion will hold its shape much better during cutting and frying.
The seasoned flour mixture gives the Bloomin’ Onion its signature crispy coating. Paprika provides color and warmth, garlic powder adds savory flavor, while cayenne brings a little heat. Black pepper and salt round everything out.
Eggs and milk create a simple dipping mixture that helps the seasoned flour cling securely to every onion petal. Getting good coverage here is the key to achieving a thick, crunchy crust.
For frying, use a neutral cooking oil with a high smoke point. You want enough oil for the onion to cook evenly while maintaining a steady temperature.
The dipping sauce combines mayonnaise, ketchup, horseradish, paprika, oregano, black pepper, and a touch of cayenne. It’s creamy, tangy, slightly spicy, and especially good with the crispy onion.
The exact measurements are included in the recipe details below.
How to Make an Outback-Style Bloomin’ Onion Step by Step
Step 1: Choose and Prepare the Onion
Start with a large, firm sweet onion. Trim away the top end and carefully remove the outer papery skin while keeping the root end intact. The root is important because it holds all of the petals together.
Step 2: Cut the Onion Into Petals
Place the onion root-side up or down depending on your preferred cutting position. Make vertical cuts from the top toward the root, stopping before you reach the bottom. Continue making evenly spaced cuts around the onion until you’ve created multiple sections.
The most important part is not cutting completely through the base. If the cuts reach the root, the onion will fall apart instead of opening into a flower shape.
Step 3: Help the Onion Open
Gently separate the sections with your fingers to encourage the onion petals to spread. Place the onion in ice water and let it soak for about two hours. This helps the individual layers open up and makes it easier to coat between the petals.
Step 4: Prepare the Seasoned Flour
While the onion is soaking, combine the flour, paprika, cayenne pepper, garlic powder, black pepper, and salt in a large bowl. Mix thoroughly so the spices are evenly distributed throughout the flour.
Step 5: Make the Egg Wash
In another bowl, whisk together the eggs and milk until smooth. This mixture will help the seasoned flour adhere to the onion and create a crisp coating once fried.
Step 6: Coat the Onion
Take the soaked onion out of the water and gently shake off any excess moisture. Carefully separate the petals so the seasoned flour can reach as many layers as possible.
Place the onion into the seasoned flour mixture and work the flour between the petals. Turn it gently and make sure the outside is well covered. The more evenly you coat the onion, the crispier the finished appetizer will be.
Step 7: Dip It in the Egg Mixture
Carefully transfer the floured onion into the egg mixture. Spoon the mixture over the onion and gently separate the petals to help the egg reach the inner layers.
Allow the excess egg mixture to drain away before returning the onion to the seasoned flour. This second coating gives the Bloomin’ Onion a thicker, crunchier crust.
Step 8: Add the Final Coating
Return the onion to the seasoned flour and coat it thoroughly for a second time. Gently shake away any loose flour, then place the coated onion on a tray while the oil heats.
Take your time during this step. Getting seasoning between the individual petals is what gives the finished onion that crispy texture throughout instead of leaving some sections plain.
Step 9: Heat the Oil
Heat the frying oil in a deep, heavy pot to approximately 350°F (175°C). Maintaining the correct temperature is important. If the oil is too cool, the coating can become greasy, while excessively hot oil may brown the outside before the onion has a chance to become tender.
Always use caution when working with hot oil and avoid filling the pot too high.
Step 10: Fry the Bloomin’ Onion
Carefully lower the coated onion into the hot oil, keeping the root side positioned appropriately so the petals remain open. Fry until the coating becomes deep golden brown and crisp.
Depending on the size of the onion and the temperature of the oil, cooking time can vary. Watch the color closely rather than relying only on the clock. The finished coating should look crunchy and evenly browned.
Step 11: Drain the Onion
Once golden and crispy, carefully remove the onion from the oil using a large slotted spoon or suitable kitchen utensil. Allow excess oil to drain before transferring it to a plate lined with paper towels or a wire rack.
Letting the onion drain briefly helps preserve the crisp coating instead of allowing it to become soggy.
Step 12: Make the Dipping Sauce
While the onion is cooking, combine the mayonnaise, ketchup, horseradish, paprika, oregano, black pepper, and cayenne in a small bowl. Stir until smooth and evenly blended.
Taste the sauce and adjust the seasoning according to your preference. For a milder dip, reduce the cayenne. If you enjoy more heat, add a little extra horseradish or cayenne pepper.
Step 13: Serve Immediately
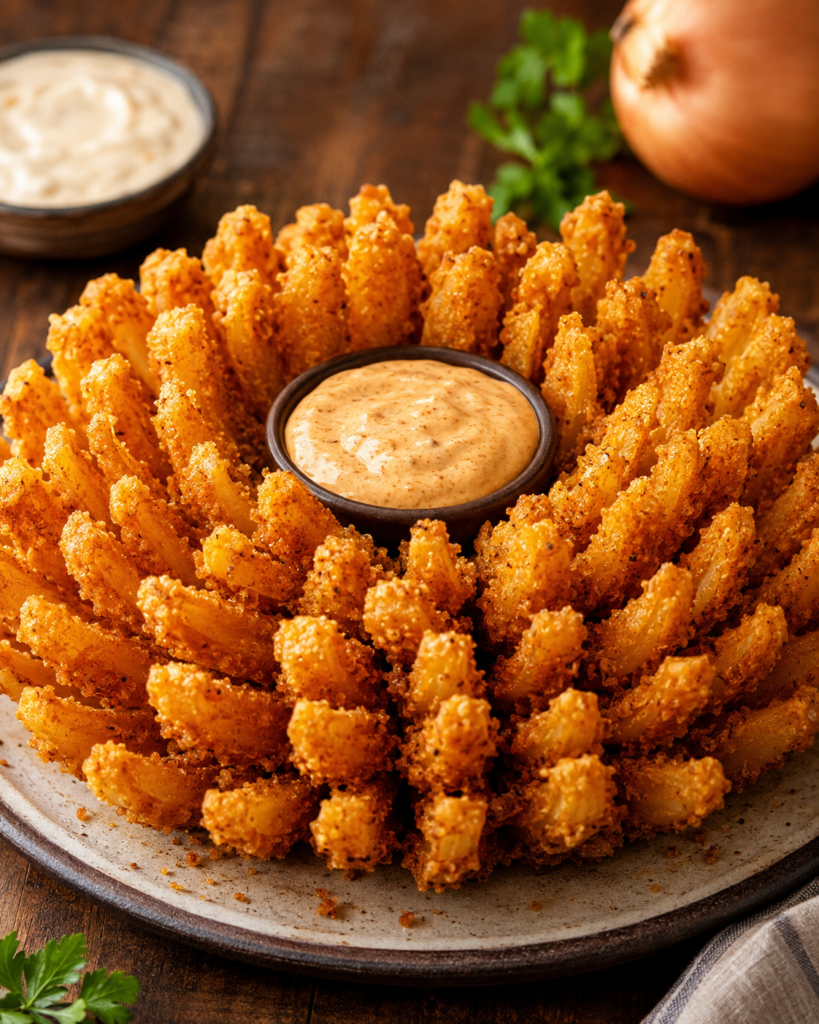
Place the crispy Bloomin’ Onion on a serving plate and put the dipping sauce in the center. Serve while the petals are still hot and crunchy.
Gently pull individual petals away from the center and dip them into the creamy sauce. The contrast between the crunchy seasoned coating, tender onion, and cool creamy dip makes every bite incredibly satisfying.
Expert Tips for the Best Bloomin’ Onion
- Choose a large onion with a firm, symmetrical shape.
- Keep the root end intact when cutting so the onion stays together.
- Make the cuts as evenly spaced as possible.
- Don’t cut all the way through the bottom of the onion.
- Soaking the cut onion in cold water helps the petals open.
- Separate the petals gently before coating.
- Make sure the seasoned flour reaches between the layers.
- A double coating creates a thicker and crunchier crust.
- Keep the frying oil close to 350°F (175°C).
- Don’t overcrowd the pot while frying.
- Drain the onion immediately after frying.
- Serve it as soon as possible for maximum crispiness.
Recipe Variations
Extra Spicy Bloomin’ Onion
If you enjoy appetizers with plenty of heat, increase the cayenne pepper in the coating and add hot sauce to the dipping sauce. A little crushed red pepper can also give the crust an extra kick.
Smoky Paprika Version
Use smoked paprika instead of regular paprika for a deeper, slightly smoky flavor. This works particularly well with sweet onions.
Garlic Parmesan Coating
Add finely grated Parmesan cheese and a little extra garlic powder to the seasoned flour for a savory, cheesy variation.
Mild Family-Friendly Version
Reduce or omit the cayenne pepper and serve the onion with a mild creamy dipping sauce. The naturally sweet onion still provides plenty of flavor without the heat.
Air Fryer Inspired Version
If you’d rather avoid deep frying, you can experiment with cooking the coated onion in an air fryer. The texture will be somewhat different from traditional deep-fried versions, but it can still produce a pleasantly crisp exterior.
How to Store Leftovers
A Bloomin’ Onion is best eaten immediately because the crispy coating gradually softens as it sits. If you do have leftovers, allow the onion to cool completely before placing it in an airtight container.
Refrigerate leftovers and use them within a couple of days for the best quality. Keep the dipping sauce stored separately.
How to Reheat a Bloomin’ Onion
For the best chance of restoring the crispy texture, reheat the onion in an air fryer or oven rather than using the microwave.
Heat it until the center is warm and the outside becomes crisp again. Avoid overheating, as this can make the onion dry and tough.
The microwave is convenient but tends to soften the coating, so it’s better reserved for situations when speed matters more than crunch.
What to Serve With Bloomin’ Onion
This appetizer is especially delicious alongside other casual, shareable foods. It works beautifully as part of a game-day spread or a relaxed family dinner.
- Grilled steak.
- Chicken sandwiches.
- Classic burgers.
- Chicken wings.
- Grilled chicken.
- French fries.
- Loaded potato wedges.
- Fresh coleslaw.
- Garden salad.
- Other favorite dipping sauces.
Frequently Asked Questions
What type of onion is best for a Bloomin’ Onion?
A large sweet onion is an excellent choice because it has a pleasant flavor and becomes tender and slightly sweet when cooked. Choose an onion that’s firm and large enough to create plenty of petals.
How do I keep the onion from falling apart?
The most important thing is to leave the root end intact. Make your cuts from the top toward the root but stop before reaching the bottom. The intact base acts like a hinge that holds the petals together.
Why should I soak the onion before coating it?
Soaking helps the cut sections separate and open, making it easier for the coating to reach between the petals. It also makes the onion easier to work with during preparation.
Can I prepare the onion ahead of time?
Yes. You can prepare and coat the onion ahead of cooking and keep it refrigerated for a short period. For the best texture, fry it shortly before serving.
How do I make the coating extra crispy?
Make sure the onion is well coated between the petals and consider using a double coating. Most importantly, keep the frying oil at a steady temperature and avoid overcrowding the pot.
Why did my coating become greasy?
Oil that isn’t hot enough can cause the coating to absorb too much oil. Maintaining a consistent frying temperature helps the exterior become crisp rather than greasy.
Can I make the dipping sauce less spicy?
Absolutely. Reduce or omit the cayenne and horseradish for a milder sauce. You can also add a little extra mayonnaise to soften the heat.
Can I use another type of onion?
You can experiment with other large onions, but sweet onions are particularly well suited to this preparation because their flavor becomes pleasantly mellow when cooked.
Can I make this without deep frying?
You can try an oven or air-fryer method, although the texture will not be exactly the same as a traditionally deep-fried Bloomin’ Onion. Deep frying provides the characteristic crunchy coating and even browning.
How long does the dipping sauce last?
Store the sauce in a covered container in the refrigerator and use it within a few days. Stir it before serving if it has been refrigerated.
Final Thoughts
This Outback-style Bloomin’ Onion is the ultimate appetizer for anyone who loves crispy, savory food with plenty of flavor. A large sweet onion is transformed into a beautiful flower of crunchy, seasoned petals, while the creamy dipping sauce provides the perfect cool and tangy contrast.
The recipe does require a little patience when cutting and coating the onion, but the result is well worth the effort. Taking the time to separate the petals and season them thoroughly ensures that every bite has the crispy coating and bold flavor you’re looking for.
It’s especially fun to make when you’re entertaining because the finished onion becomes part of the experience. Place it in the center of the table with the dipping sauce and let everyone pull apart the petals themselves.
Serve it fresh and hot for the best texture, pair it with your favorite casual dishes, and enjoy a restaurant-inspired appetizer right at home.