

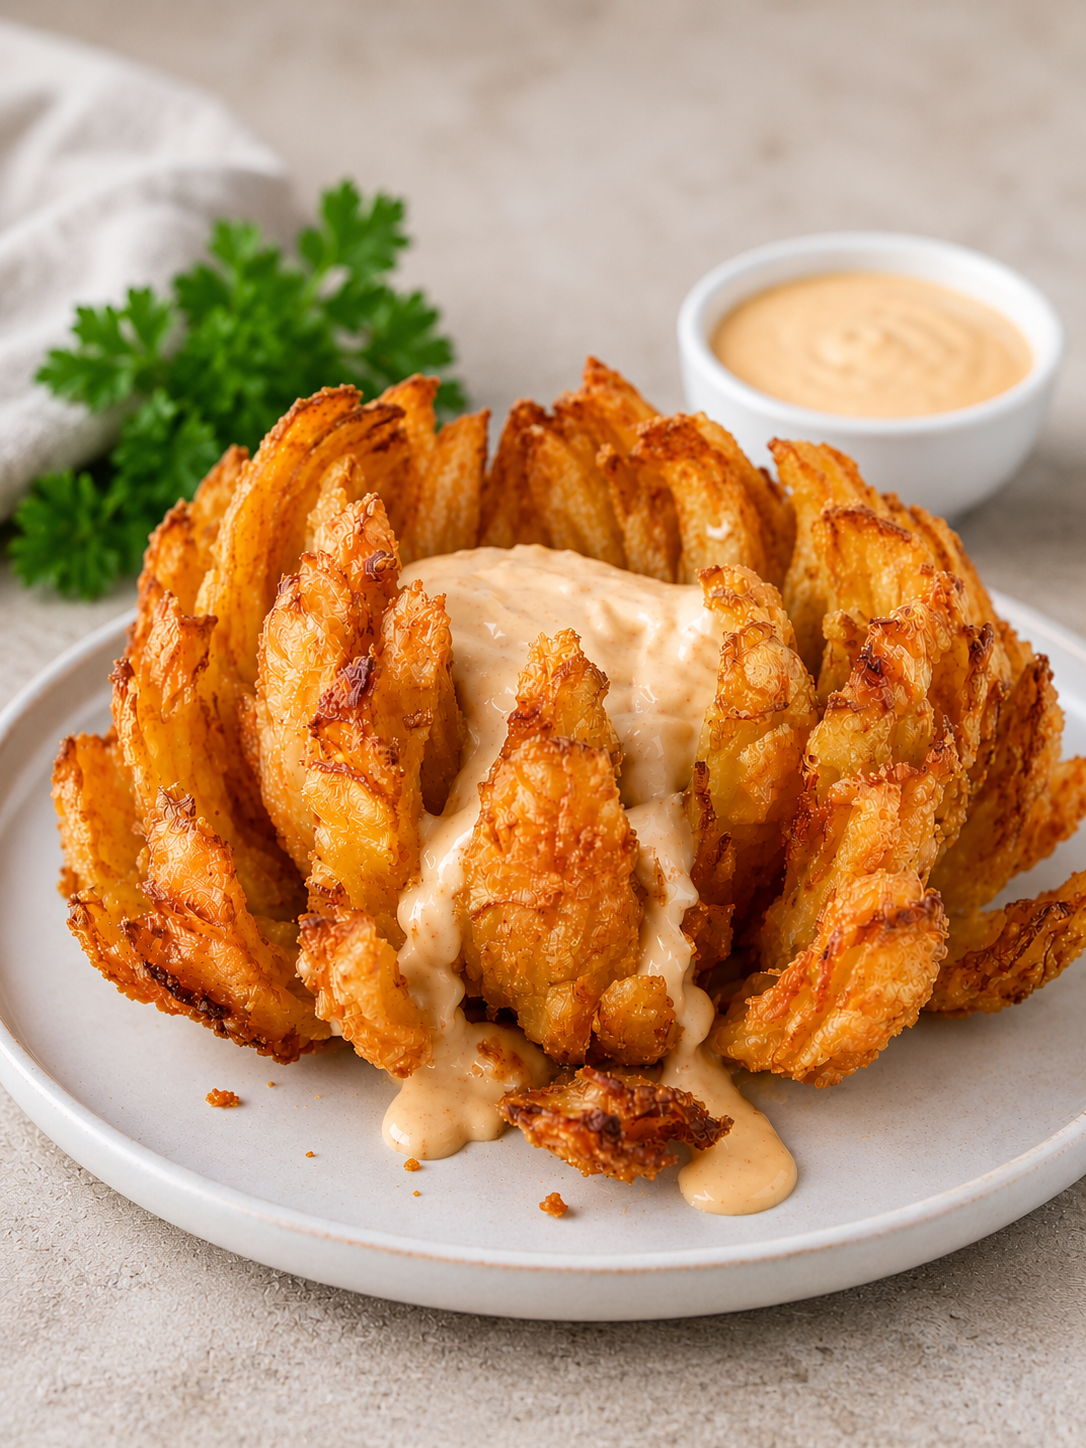
There’s something undeniably fun about serving a blooming onion. With its eye-catching shape, irresistibly crispy coating, and bold, savory flavor, it’s the kind of appetizer that instantly becomes the center of attention. Whether you’re hosting game day, planning a family cookout, or simply craving a restaurant-style snack, this homemade version delivers all the crunch and flavor you love.
The best part is that making a blooming onion at home is much easier than it looks. With a few pantry staples, a large sweet onion, and a flavorful dipping sauce, you can create an appetizer that’s crispy on the outside, tender on the inside, and perfect for sharing around the table.
Flavor & Texture Highlights
- Golden, crispy coating with incredible crunch.
- Tender, naturally sweet onion petals.
- Bold seasoning in every bite.
- Perfect balance of crispy exterior and soft interior.
- Delicious with a creamy, zesty dipping sauce.
- A fun appetizer that’s perfect for sharing.
Jump to Section
- Why You’ll Love This Recipe
- What You’ll Need
- How to Make It
- Expert Tips
- Recipe Variations
- Storage & Reheating
- What to Serve With
- Frequently Asked Questions
- Final Thoughts
Why You’ll Love This Recipe
If you enjoy restaurant-style appetizers, this blooming onion deserves a place on your menu. It’s crispy, flavorful, and surprisingly simple to prepare at home. Every petal is coated with a seasoned crust that fries up beautifully while the onion inside becomes sweet and tender.
This recipe is also perfect for entertaining because it looks impressive without requiring advanced cooking skills. Serve it for football parties, backyard barbecues, birthdays, or holiday gatherings, and watch everyone gather around for their first crispy bite.
Another great advantage is how customizable it is. Adjust the seasoning, add extra spice, or pair it with your favorite homemade dipping sauce to make it your own.
What You’ll Need to Make This Recipe
A large sweet onion is the star of the recipe. Sweet varieties develop a wonderful flavor as they cook while maintaining their signature blooming shape.
The crispy coating starts with all-purpose flour blended with paprika, garlic powder, onion powder, black pepper, cayenne pepper, and a few additional seasonings that create a bold, savory crust.
Eggs and milk help the seasoned flour stick to every onion petal, creating layers that fry into an incredibly crunchy coating.
Vegetable or peanut oil is ideal for deep frying because it maintains a steady temperature and produces a crisp, golden finish without overpowering the flavor.
To complete the appetizer, prepare a creamy dipping sauce using mayonnaise, ketchup, horseradish, paprika, garlic powder, and a few simple pantry seasonings for the perfect balance of tangy, smoky, and slightly spicy flavors.
The complete ingredient measurements and cooking details will be included in the preparation section below.
How to Make Outback-Style Bloomin’ Onion Step by Step
Step 1: Prepare the Onion
Start by peeling a large sweet onion and trimming just a small portion from the top while leaving the root intact. The root will hold the onion together during cooking. Place the onion root-side down on a cutting board and carefully make evenly spaced cuts from the top toward the root, stopping about half an inch before reaching the bottom. Rotate the onion as you work until you’ve created multiple “petals.” Gently separate the layers with your fingers to help the onion bloom.
Step 2: Mix the Seasoned Coating
In a large bowl, whisk together the flour with paprika, garlic powder, onion powder, black pepper, cayenne pepper, salt, and a pinch of dried herbs if desired. The combination of spices creates a flavorful crust that complements the natural sweetness of the onion.
Step 3: Prepare the Wet Mixture
In a separate bowl, beat together the eggs and milk until smooth. This mixture helps the seasoned flour cling to every petal, creating a thick, crispy coating once fried.
Step 4: Coat the Onion
Carefully dust the onion with the seasoned flour, making sure it reaches between every layer. Shake off any excess, then dip the onion into the egg mixture, allowing it to flow into all the petals. Finish by coating the onion with another generous layer of the seasoned flour for maximum crunch.
Step 5: Chill Before Frying
Place the coated onion in the refrigerator for about 20 to 30 minutes. This simple step helps the coating adhere better and results in a crispier finish after frying.
Step 6: Fry Until Golden Brown
Heat the oil to approximately 350°F (175°C). Carefully lower the onion into the hot oil with the root side facing up. Fry until beautifully golden and crispy, turning if necessary to ensure even browning. Once cooked, transfer the onion to a wire rack or paper towels to drain any excess oil.
Step 7: Prepare the Dipping Sauce
While the onion rests, stir together mayonnaise, ketchup, prepared horseradish, paprika, garlic powder, black pepper, and a splash of lemon juice. Refrigerate the sauce for a few minutes to allow the flavors to blend together.
Step 8: Serve Immediately
Place the blooming onion on a serving platter with the dipping sauce in the center or alongside it. Serve while it’s still hot so every petal stays wonderfully crisp.
Expert Tips
- Choose a large sweet onion for the best flavor and presentation.
- Leave the root attached so the onion stays together while frying.
- Take your time separating the petals gently to avoid breaking them.
- Double-coating the onion creates an extra crispy crust.
- Chilling the coated onion before frying helps the coating stay in place.
- Keep the oil temperature consistent for even cooking.
- Drain the onion on a wire rack instead of paper towels to maintain maximum crispiness.
- Serve immediately for the best texture and flavor.
Recipe Variations
This blooming onion is easy to customize depending on your taste preferences and the occasion.
Spicy Version
Add extra cayenne pepper, chili powder, or a dash of your favorite hot sauce to the coating for more heat.
Smoky Flavor
Use smoked paprika instead of regular paprika to give the crust a subtle smoky depth that pairs beautifully with the sweet onion.
Parmesan Crust
Mix finely grated Parmesan cheese into the dry coating for an extra savory, cheesy finish.
Air Fryer Option
If you prefer a lighter version, lightly spray the coated onion with cooking oil and cook it in an air fryer until the coating becomes crisp and golden. The texture will be slightly different from deep frying but still delicious.
Herb-Seasoned Version
Fresh parsley, chives, thyme, or rosemary can be added to the seasoning blend or sprinkled over the finished onion for extra freshness and color.
Blooming Onion
Ingredients
Method
- Start by peeling a large sweet onion and trimming just a small portion from the top while leaving the root intact.
- Place the onion root-side down on a cutting board and carefully make evenly spaced cuts from the top toward the root, stopping about half an inch before reaching the bottom to create multiple 'petals.'
- Gently separate the layers with your fingers to help the onion bloom.
- In a large bowl, whisk together the flour with paprika, garlic powder, onion powder, black pepper, cayenne pepper, salt, and optional dried herbs.
- In a separate bowl, beat together the eggs and milk until smooth.
- Carefully dust the onion with the seasoned flour, ensuring it reaches between every layer.
- Shake off any excess, then dip the onion into the egg mixture.
- Finish by coating the onion with another generous layer of the seasoned flour.
- Place the coated onion in the refrigerator for about 20 to 30 minutes.
- Heat the oil to approximately 350°F (175°C) and carefully lower the onion into the hot oil.
- Fry until beautifully golden and crispy, turning if necessary.
- Transfer the onion to a wire rack or paper towels to drain excess oil.
- In a bowl, stir together mayonnaise, ketchup, horseradish, paprika, garlic powder, black pepper, and lemon juice.
- Refrigerate the sauce for a few minutes.
- Place the blooming onion on a serving platter with the dipping sauce in the center.
- Serve while hot so every petal stays crisp.